Sunday, September 27, 2015

More Leg Work

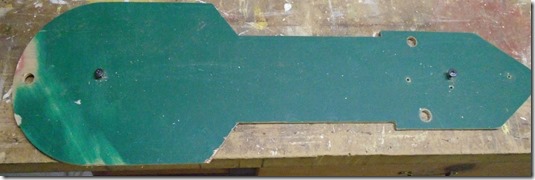
The final operation I am going to do for now on the leg framework is to cut out the inside of the middle layer. There are two reasons to do this. First it reduces the weight of the let by a little bit. Second, if you plan to motorize the feet, it provides a place to run the wires. The cutout of the shoulder also provides some space for the leg mounting hardware.

On the 3/4” center layer I marked a line 1 1/4” in from the edge of the leg. It wasn’t necessary to follow all the contours of the edge, 1 1/4” provides enough clearance all the way around. The line goes right to the end of the foot leaving an open space to run wires if you want to.

DSC01289

Before making the cuts on the band saw I drilled some holes at key points to make if easier to turn the piece.

DSC01291

Here is the final piece temporarily pinned to the inside layer. This cutout will not be seen so the rough cut it not a problem.

DSC01292

Saturday, September 5, 2015

Leg Pockets


Where the legs meet the shoulder there is a detail feature that goes into a pocket on both sides of each leg.

LegPockets

This pocket is easier to cut out before the layers of the leg are assembled. To make these cuts I used a router with a guide collar and a template. I stared out by making a template out of a piece of scrap 1/4” MDF. The cut out on the right is the actual template.

DSC01326

The shape is pretty simple so I just laid it out based on the measurements in the plans being sure to add the distance between the edge of the guide collar and the edge of the bit to the measurements so that the template cutout is slightly larger then the final size of the pocket. Since the shape has some tight corners I used the smallest possible router bit, but it will still require some manual cleanup in the corners.

With the legs temporarily assembled I marked the location of the pockets. These lines will be used to align the template.

DSC00956

Next I screwed the template to the inside surface of one of the leg side pieces. The cut does not go all the way through this piece so I adjusted the router for the correct depth and then made the cut.

DSC01078

The center layer is cut the same way, but I put a scrap piece of wood under the leg piece because this cut needs to be all the way through.

DSC01077

With the legs again temporarily re-assembled you can see the finished pocket.

DSC01079

Saturday, August 29, 2015

Leg Guide Pegs

The next thing I did on the legs was to drill holes for guide pins. This isn’t strictly necessary, but it will help temporarily hold the legs together while I do other work on them and will also help align them when I go to do the final assembly. I started by drilling the hold in my template, one at the top and two at the bottom. I have seen people do more pegs but I thought this would be enough.
DSC00978

Before drilling the holes I made sure that I marked all the leg pieces with which leg they go to, left or right, and which layer they are, inside or outside. In theory if you are very accurate in drilling the holes the pieces should be interchangeable, but I am not going to take that chance. I used this template to mark the holes on the 3/4” center layer of the legs and drilled these holes all the way through. I used a Forstner bit for this which gives a nice clean hole with a flat bottom which will help for they areas where I don’t want to drill all the way through.

DSC01316

Next, I put the middle layer I just drilled on top of the outside layer and used the drill bit to mark the location of the holes.

DSC00977

I drilled the bottom two holes all the way through since there is that small outside ankle layer that will cover them. The top hole I only drilled part of the way through since the hole would be see if I went all he way through. Next I used the middle layer to mark the inside layer. When you do this, remember to flip the middle layer over so the surfaces are together the same way they will be when it’s assembled. As I said earlier, if everything was measured perfectly this wouldn’t make a difference, but I prefer no to take that chance. Just like the outside layer the top hole on the inside layer should not go all the way through, but the bottom two can since they will be covered by another small ankle piece.

I drilled the bottom holes into the outside ankle piece so it could be pinned in place, but the inside ankle layer is so thin, I chose not to drill the holes in it.

Once all the holes were drilled I measured the depth of  the holes and cut dowel pins for each hole.

Saturday, August 8, 2015

Leg Structure Part 3


In my last post I showed how I cut out the three main pieces of each leg. In this post I will cover a few more of the details of the leg body.DSC00954

The first thing thing that needs to be done is to cut the point off the middle and inside layers of the leg, leaving only the outside full length. I did this by simply measuring the length and then cutting it off on a miter saw.

DSC01204

Next, two small layers of the ankle need to be made. The outside layer, on the left, is made out of 1/2” plywood. The inside layer, on the right, is only 1/4” thick so I made it from a piece of MDF. I could have cut these on the router table like the other layers, but they are pretty simple shapes so I just traced them from the template, and cut them on the table saw and miter saw. For the rounded end I made a rough cut on a band saw and then finished it on the drum sander.

AnglePieces

Sunday, July 5, 2015

Leg Structure Part 2


In my last post I showed how I created the template to cut the layers of the leg frame, in this post I will show how the cuts were made. The first step was to layout how the pieces will be cut from the plywood and trace around each piece. Since the legs are wider at the top then at the bottom you can get them a little closer together by alternating directions.

DSC00949 - Copy

The next step was to rough cut them on the band saw to make the pattern cutting a little easier. I started by just cutting between them to separate each piece. I then drilled some holes at the bottom of the shoulder on each side to make it easier to make the rough cut and then cut close to the line on a band saw.

DSC00950

Once the pieces were rough cut I screwed the template to one of the pieces. The template doesn’t need to line back up perfectly with the trace line as long as there is wood sticking out all the way around. I attached the template with two screws. Since only one side of the outside pieces will be seen I won’t even need to patch these holes.

DSC00952

I made the pattern cut in a router table with a small pattern cutting bit. Before making the cut the height of the bit needs to be set carefully so that the bearing runs along the edge of the template and the cutter goes the full height of the plywood. When you are switching between cutting he 1/2” and 3/4” pieces, don’t forget to reset the height! I forgot to do this when switching from a 3/4” cut to a 1/2” and took a chunk out of both my template and the leg piece.

DSC01082

When making a pattern cut it is a good idea to use a starting pin. This gives you something to hold the piece firmly against as you bring it into the cutter. Without it the piece will tend to kick out when you first touch the cutter.

DSC00953 
With everything setup the cuts go pretty quickly.

DSC00954

Sunday, June 28, 2015

Leg Template


In my last post I talked about using a router to do pattern cutting, so the next step is to make the template of the leg. I started with this drawing which includes both the leg and the ankle:

CS-L Leg and Ankle drawing

There are a couple things to note about this drawing. Above the ankle is a feature called the ankle bracelet. This is a separate piece which is added later so you need to make the pattern so the side of the leg goes all the way down to the ankle. I have circled this in blue below. The red circle shows a notch in the leg which is also something that will be added later.

AnklePlanDetail

I printed out the template full size and used it to trace the pattern onto a piece of lauan plywood, but you could also glue the template down like I did for the frame components. With the pattern transferred to the plywood I need to find accurate ways of cutting it out. For the long cuts I used a circular saw and a guide fence. I have a small, battery powered circular saw which is perfect for making these sorts of cuts.

DSC00946

For the curve of the shoulder I did a rough cut on the band saw and then finished it using the router table jig that I have used for the frame cuts.

DSC00947

The angle on the ankle were just on a miter saw, and the rest of the cuts were finished on a band saw. Finally I cleaned up the rounded end of the angle on a drum sander.

DSC00949

Sunday, June 21, 2015

Web Resources

I don't think I would have tackled this project if it wasn't for the wealth of information available on the web. Here are some good source of information on droid building.

Astromech.net - The official web site of the R2 Builder's Club. If you are going to do a build this is the first site you should sign up for. The message board has a wealth of great information and a lot of active member that can answer any questions you might have. There is a community of people who make droid parts so there are a couple forums on this site that announce when people are going to do runs of the parts. Also be sure to check out the Builders Logs forum which has build logs like this one.

Astromech.net now also hosts all the official blueprints that were alson on the Yahoo Group. You can find these files here.

R2-D2 Builders Club Yahoo Group - You will want to sign up for this group if for no other reason then to access the files area. Here you will find an archive of "official" blueprints as well as tons of other files to help with your build.

Droid Wiki - Part of the Astromech.net site, this has some nicely organized information on droid building. If you are starting out I highly recommend reading the Introduction, Beginners Guide, and the CSR Overview.
Besides the builders logs on the Astromech.net forum, you will find a lot of blogs that show people’s builds. I find my self referring to James Feurtado’s blog a lot because he built an R5 and he did a lot of it from scratch using wood so it’s a close match to how I plan to build. I also like a lot of the techniques found in this blog.
These are just a few of the resources I have been using so far. I will post more as I go along.