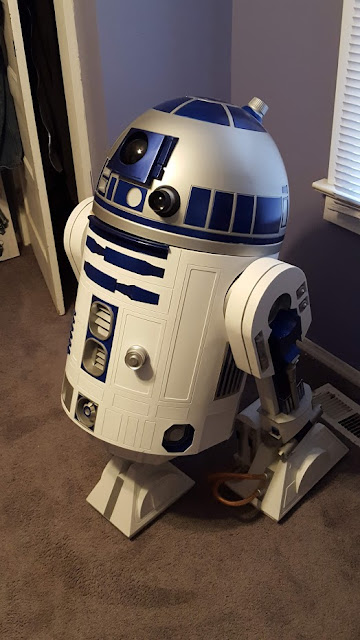
Wednesday, December 30, 2020

Utility Arms

Like a lot of my build I decided to make the utility arms from scratch out of wood and was reasonably happy with the results, although in hindsight I would probably have been better off buying resin versions of these, or getting them 3D printed.

I started by making a paper template from the blueprints. I glued this to a thin piece of wood that I will use in a later step.


I rough cut the template on the bandsaw and then used various sanding tools for clean it up.


I glued up two pieces of MDF to make a wood blank of the right thickness.


I glued another copy of the paper template to the wood blank and rough cut the shape on the bandsaw.


I screwed the wood template to this piece and then used my router table with a pattern cutting bit to cut the final shape of the curved parts. The one screw hole will be where the pivot point will go, but the other I will fill with wood filler.


The router can’t get into all the tight spots so I had to do some hand sanding and filing to clean up those spots.


With that profile complete I created another paper template and used it do draw on the other profile.


Once again I rough cut this profile on the band saw and the did filing and sanding to clean it up.


Here is the final product with a couple coats of primer.


Saturday, December 26, 2020

Progress Photos

As I have mentioned in previous posts this blog is way behind my actual progress. Here are some progress pictures take throughout the years.

This is from January of 2016 when I did a test fit of the various assemblies.


Here is a picture from December 2018. The biggest different you will notice is that he is no longer a R5-D4. Once I had the body together and started to test fit the skins, I was so happy with the way it looked that I decided that there was not way I couldn’t do an R2-D2.


Finally, here are some picture from April 2019 just before his first public appearance at my companies May the 4th celebration. At this point it is just a static figure, but I have started to work on the dome lights and plan to do some other mechanical editions to it.


Wednesday, December 23, 2020

Read Door Frame

On the back of the frame I created a removable panel that allows access to the interior of the body.

Here is a pictures of the back of the frame where the door will go. I have seen two approaches to the power coupling that is at the bottom of the back. I have seen some people attach the power coupling to the frame and build the door around it. I decided to integrate the power coupling into the door.


Here are the frame components. I cut these using the same techniques as the rest of the frame which you can find in my earlier posts.


I wanted to be sure the door had a good fit to the frame so I first fit the uprights and clamped them in place.


I dry fit the top part of the frame and used some folded up paper to get proper clearance between the door and the body frame.


Hear I am fitting the lower rail into the frame.


Here are the rest of the components fit and temporarily clamped. I used folded pieces of paper again on the bottom to establish the proper clearance.


Once I was comfortable with the fit I took everything apart, glued it up and used a pneumatic staple gun to secure the parts.