Wednesday, January 27, 2021

Coin Return


These parts are called the coin returns and there are three of them along the bottom edge of the body, each a little different. I scratch built these from styrene.


I started by laying out the parts based on the blueprints.


Here are the top and sides of the slot part cut out.


The top and bottom have a curve on one edge that matches the curve of the body. To cut these accurately I cut a piece of plywood with the same curve as the body. I then clamped the styrene pieces to to it and used it as a guide to cut and sand the shape.


Here are the top, bottom and sides glued up.


Here is the part with the second top piece and back in place. I then glued the front part to this and clamped it to hold it to the curve while it dried.


Monday, January 25, 2021

Gluing Styrene


For gluing styrene I used a couple different products. The first is the Testors plastic model glue. This comes in a gel form that has a fairly long drying time. This can be good, especially when you have to put the glue over a large area before putting the parts together. The downside is that the longer drying time requires you to hold the pieces together longer.

https://www.amazon.com/Testor-Corp-3501-Plastic-Model/dp/B00BH0NN1A/ref=sr_1_6?dchild=1&keywords=TES3512A&qid=1611623950&s=home-garden&sr=1-6-catcorr


The second product is the Plastruct Plastic Weld. This comes in a liquid form with a brush for applying it in the cap. This has a much faster drying time then the Testors so you don’t need to hold pieces together as long.

https://www.amazon.com/Plastruct-Plastic-Weld-applicator-Bottle/dp/B00FDFWJD8


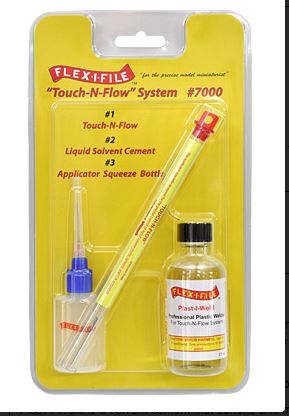
The third product is the Flex-I-File Touch-N-Flow system. This is a liquid similar to the Plastruct product, but you apply it with an applicator that is composed of a long glass tube with a metal needle point. Instead of applying the glue to the parts and then putting them together, you hold the parts together dry and then run  the applicator along the seams. The glue will get pulled into the seams and dry very quickly.

 https://www.flex-i-file.com/adhesives.php


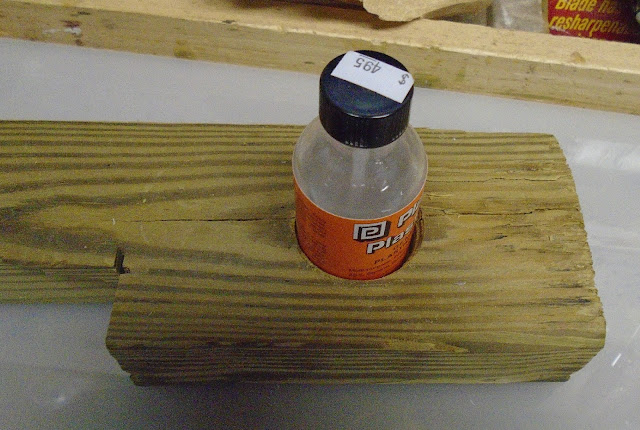
Each of these products has pros and cons so I used different ones in different situations. One more tip, for the bottle products I highly recommend making something to hold the bottles so you don’t risk knocking them over. I simply drilled a hole in a scrap piece of wood.


Saturday, January 9, 2021

Octagon Port Part 2


To make the center part of the octagon port I used a circle cutter in my drill press to jut the various sized circles needed out of the appropriate thicknesses of wood.


Here are the disks that will make up the part. I did the bottom one out of styrene to make it easier to glue it to the housing.


I glued the pieces together and aligned them with a dowel.


I did not try to cut the dowel to the exact length, instead I left it a little long on each end so I could and it smooth later. To be able to clamp this I used a few washers around the dowel on either end.


Since this part and the housing will be different colors I did not attach them together yet, I will do this after they are painted.

Tuesday, January 5, 2021

Octagon Port Part 1

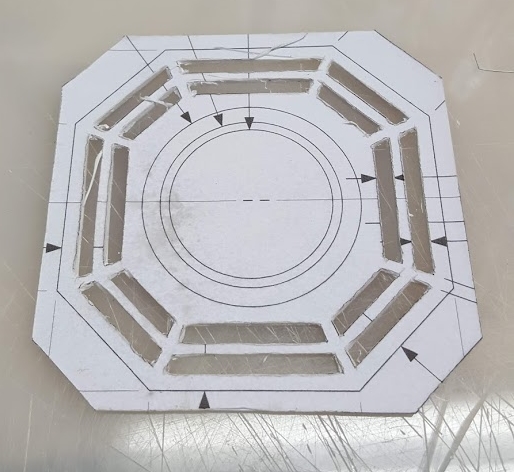
I built the octagon port from scratch from styrene and wood. I started by printing a template for the back from the plans. My original plan was to cut out the template and then trace it onto the styrene, but it turned out to be easier to use spray adhesive to attach the template.


Using the template I cut out the slots in the back with an X-Acto knife.


I used files and emery boards to clean up the edges, and then removed the template.


I used the plans again to cut the side piece. Remember that the top and bottom have to be curved to fit the contour of the body. I glued the sited together and to the back and used to tape to hold everything together while it dried.


Finally I cut the corner pieces to fit. Like the top and bottom these all needed to be curved to fit the contour of the body.