Sunday, April 25, 2021

Body Skins Part 2


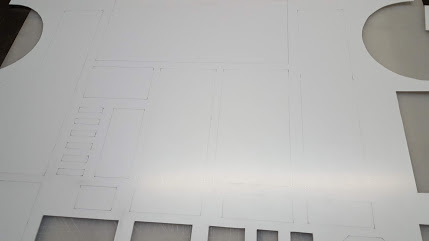
The next step in making the skins was to cut out the paper template so I could use it to trace the template onto the styrene. You can faintly see the lines in the picture below. With the pattern transferred to the styrene I cut it out using an X-Acto knife. This was a very tedious process, you just need to take your time and periodically change your blade. In the spots where the pieces of the skins come together under the legs I left the styrene long and would trim it later during installation so I was sure I would get a tight seam.



Sunday, April 11, 2021

Body Skins Part 1


By far one of the most challenging parts of building R2 was the skins. The skins are made of two layers of .04 inch styrene. The first challenge was finding the material. I was unable to find any place to get it local. I did find 4x8 sheets online but the shipping costs were outrageous. Eventually I found SIBE-R Plastic Supply which sold 24” x 48” pieces at a reasonable price and shipping.

https://sibe-rplasticssupply.com/shop/ols/products/polystyrene-white-plastic-sheet-030-pick-your-size/v/POLYSTWH0402448

This was not big enough to make each layer out of one piece, so I did each layer in two pieces, one for the front and one for the back. The seams were pretty small and were under the legs so where easy to hide. This also made the pieces easier to work with.

Below are pictures of the templates for the skins. I took these to a print shop and had them printed fully size. If you have them printed be sure to take some measurements to be sure they are printed at the right scale. The black areas are cut all the way through. On the outside layer you will make cut outs for the panels and the pieces that are cut out are further cut to make panel details.

There is a good article on Astromech.net with more information on the skins..

https://astromech.net/droidwiki/Making_Your_Own_Skins

Inner layer.


Outer layer


Sunday, April 4, 2021

Leg Mounting


Here is a look at how I mounted the legs to the frame., Each leg has a piece of threaded iron pipe screwed into the shoulder flange. I used a piece of pre-threaded pipe and just cut it in half.


The two smaller pipes attached to the legs then go into a larger piece of pipe.


To hold that larger pipe in place I added blocks on the inside of the frame. I also wrapped some tape around the pipe to keep it centered and not slide out.


To make the blocks I started with a square piece of plywood and then drilled a hole the same size as the pipe.


I then cut out one side of each piece on the band saw to provide a way to get the pipe in. In hindsight I realized I only really need to to this on side, there was enough room to get the pipe in on one side without the cut out.


I glued the main piece onto the frame and the screwed the smaller piece into place when the pipe was installed. To keep the legs in the correct orientation I drilled a hole through the frame and into the shoulder hub and then inserted a pin to hold the leg at the correct angle.

Saturday, March 13, 2021

Leg Details


There are a few miscellaneous leg details that I haven’t covered yet. The foot is bolted to the leg through this hole on the bottom of the leg. To prevent the bolt from rubbing on the wood I used a copper pipe fitting. I cut it to length and glued it into the hole with epoxy.


The legs have a small groove around them. I cut the groove on the large faces with the table saw before I completely assembled the leg.


Since the side of the leg is skinned with styrene I simply cut the groove into the styrene instead of cutting into the wood.


The inside of the shoulder pockets is lined with styrene which I glued in with epoxy.


The top of the leg strut has a little cover that goes over it which I made from some 1/4 MDF.


Friday, February 26, 2021

Resin Parts

I tried to make as many of the parts from scratch as I could, but there were just some that I didn’t think I could do a good version of. For these I turned to the web site ResinParts.com. Keith sells all the R2 greblies you can need. I got them pretty quickly, the quality was excellent and the price isn’t do bad. He has also recently started selling the R5-D4 dome greblies.

Here is a picture of the resin shoulder hubs. If you buy any of these parts be sure to read the instruction on the web site for how to work with them.


Saturday, February 20, 2021

Side Vents

The side vents are the easiest of the body details.


On the left is the cutout of the front part. On the right is the back part. Since this part needs to be painted blue, I masked off the rough areas where it needs to be painted which will leave the parts in between unpainted making them easier to glue together.


Here are the painted parts with the masking removed ready to be glued together.


Saturday, February 13, 2021

Pocket Vents

‘

The pocket vents were built from styrene similar to how I built the coin returns. Here is the front face of the vent.


The vent openings need to have some thickness to them so I lined them with thicker strips of styrene.


To help with assembly I clamped the front face to a piece of plywood that had a curve cut in it that matches the curve of the body. This made it easier to glue on the pocket pieces


Here is a picture of the pocket glues in place.


Here is the almost complete part. There will need to be a piece across the back of the vents, but since that will be a different color I am not putting it on until I paint the parts.