Showing posts with label Body Detail. Show all posts

Friday, February 26, 2021

Resin Parts

I tried to make as many of the parts from scratch as I could, but there were just some that I didn’t think I could do a good version of. For these I turned to the web site ResinParts.com. Keith sells all the R2 greblies you can need. I got them pretty quickly, the quality was excellent and the price isn’t do bad. He has also recently started selling the R5-D4 dome greblies.

Here is a picture of the resin shoulder hubs. If you buy any of these parts be sure to read the instruction on the web site for how to work with them.


Saturday, February 20, 2021

Side Vents

The side vents are the easiest of the body details.


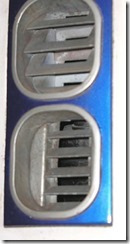
On the left is the cutout of the front part. On the right is the back part. Since this part needs to be painted blue, I masked off the rough areas where it needs to be painted which will leave the parts in between unpainted making them easier to glue together.


Here are the painted parts with the masking removed ready to be glued together.


Saturday, February 13, 2021

Pocket Vents

The pocket vents were built from styrene similar to how I built the coin returns. Here is the front face of the vent.


The vent openings need to have some thickness to them so I lined them with thicker strips of styrene.


To help with assembly I clamped the front face to a piece of plywood that had a curve cut in it that matches the curve of the body. This made it easier to glue on the pocket pieces


Here is a picture of the pocket glues in place.


Here is the almost complete part. There will need to be a piece across the back of the vents, but since that will be a different color I am not putting it on until I paint the parts.


Wednesday, January 27, 2021

Coin Return


These parts are called the coin returns and there are three of them along the bottom edge of the body, each a little different. I scratch built these from styrene.


I started by laying out the parts based on the blueprints.


Here are the top and sides of the slot part cut out.


The top and bottom have a curve on one edge that matches the curve of the body. To cut these accurately I cut a piece of plywood with the same curve as the body. I then clamped the styrene pieces to to it and used it as a guide to cut and sand the shape.


Here are the top, bottom and sides glued up.


Here is the part with the second top piece and back in place. I then glued the front part to this and clamped it to hold it to the curve while it dried.


Tuesday, January 5, 2021

Octagon Port Part 1

I built the octagon port from scratch from styrene and wood. I started by printing a template for the back from the plans. My original plan was to cut out the template and then trace it onto the styrene, but it turned out to be easier to use spray adhesive to attach the template.


Using the template I cut out the slots in the back with an X-Acto knife.


I used files and emery boards to clean up the edges, and then removed the template.


I used the plans again to cut the side piece. Remember that the top and bottom have to be curved to fit the contour of the body. I glued the sited together and to the back and used to tape to hold everything together while it dried.


Finally I cut the corner pieces to fit. Like the top and bottom these all needed to be curved to fit the contour of the body.


Wednesday, December 30, 2020

Utility Arms

Like a lot of my build I decided to make the utility arms from scratch out of wood and was reasonably happy with the results, although in hindsight I would probably have been better off buying resin versions of these, or getting them 3D printed.

I started by making a paper template from the blueprints. I glued this to a thin piece of wood that I will use in a later step.


I rough cut the template on the bandsaw and then used various sanding tools for clean it up.


I glued up two pieces of MDF to make a wood blank of the right thickness.


I glued another copy of the paper template to the wood blank and rough cut the shape on the bandsaw.


I screwed the wood template to this piece and then used my router table with a pattern cutting bit to cut the final shape of the curved parts. The one screw hole will be where the pivot point will go, but the other I will fill with wood filler.


The router can’t get into all the tight spots so I had to do some hand sanding and filing to clean up those spots.


With that profile complete I created another paper template and used it do draw on the other profile.


Once again I rough cut this profile on the band saw and the did filing and sanding to clean it up.


Here is the final product with a couple coats of primer.


Sunday, April 21, 2019

Coin Slots Part 2


In my last post I showed how I made the stock for the coin slots. The next step was to cut bevel along the top edge of both sides. I did this on the table saw and then sanded it to clean up the cut. Next I layed out the shape of each element.


With the layout done I first rough cut each element.


Instead of trying to cut the finished length and the angle, I instead used a mini belt sander to carefully sand them down to the finished shape.


To assemble the elements into a final part I cut a piece of luan to work as a backer. I initially marked off the position of each element but found that this wasn't the best way to assemble it accurately.


Instead I cut a series of small blocks that matched the distance between the elements. I glues in the first one and then use the blocks to get the correct spacing for the remainder.


Here is the finished coin slot assembly.


Sunday, April 7, 2019

Coin Slots Part 1


To make the coin slots I started with a piece of wood cut to the correct width and height and long enough to cut all the slots from the single piece. Next I marked out the location of each of the slots.

I first tried cutting the slots individually using a router bit mounted in my drill press. Unfortunately, this technique didn’t work out well so I needed to find another approach.

Instead of trying to cut the slots individually I my router table to cut a slot all the way down the stock.

I then cut a piece of wood that was the thickness of the groove and glued pieces of it on either end of each slot.

Finally I sanded the top smooth and ended up with pretty clean slots.

Thursday, May 19, 2016

Front Vent Housing

Early on in my build I decided to try my hand at some styrene work just to see how easily I could produce some of the body details. I decided to start with the front vents, and particularly the vent housings.
 

ILM R2 body vents P1010096 - Copy

The wall of the housing is a little over 1/8” thick. I initially thought it might be possible to bend some styrene that thickness but the curves were to tight. I also tried heating and bending a piece of styrene but that didn’t work either. Bending the 1/8” is probably possible if done right, but I decided on a different approach, building up the thickness with multiple pieces of thinner styrene.

I started by building a form. I cut three pieces of 3/4” thick pine to the rough dimension of the vent and then glued them together to make a 2 1/4” high block. Next I attached a template for the interior size of the vent housing cut from one of the scale plans.

DSC00892

With the template attached I cut the block to the exact size of the template and also cut most of the material on the corners. Finally I used a drum sander to round the corners down to the template and the screwed it to a piece of scrap plywood.

DSC00893

The upper vent is 1.938” deep at it’s largest point so I cut a strip of .03 styrene 2” wide (although in hindsight I would have gone a little wider to leave some room for error) and long enough to go all the way around the form with some room to spare. To hold the first layer together I beveled the opposing edges of the strip so that they overlap and cleanly as possible:


syrenejoint

To do this I beveled one edge with a file, wrapped the piece tightly around the form holding it in place with clamps and then marked it for length leaving about a 3/16” overlap. I then removed it from the form and filed the other end. With the piece prepared I re-attached it to the form, holding it in place with some squeeze clamps and finally joined the edges with some liquid styrene glue and then clamping over the seam to hold it together until the glue dried.

DSC00894

When the first piece dried I remove the clamps and left the piece on the form. Next I cut another piece of styrene the same width as the first one. I did not try to cut the exact length on each layer since each one will need to be a little longer then the previous so I just started with a piece that was long enough with a little to spare. To start the second layer I glued one end to the side of the first layer opposite where the other one started so that the seams will alternate from one side to the other. When applying each layer try to keep the piece tight down to the plywood base. The edges won’t come out perfect but this can easily be cleaned up later. Once the first edge has dried I started working my way around the piece, gluing  and clamping a small section at a time. Once I got 3/4 of the way around I bent the piece the rest of the way without glue, marked the length and then removed the piece from the form to make the length cut. Finally I put the piece back on the form and glued the end.

DSC00896

I repeated this process until I had built up the proper thickness for the housing . You can see that the final seam didn’t come out perfect but I can probably clean this up with some filler and sanding. You may want to apply your layers so that the seam ends up at the bottom of the housing so it will be less noticeable

To finish the part I sanded the back end of the housing on a belt sander to get it level. Not that the back of the lower housing has a small angle to it, but the upper is square. With one edge cleaned up I sanded the other end to being the housing down to it’s final height. If you left a lot of extra you could start by cutting some off on a band saw. The front edges of the houses is slightly curved. I handled this by marking lines along the side at the final height and the formed the curves on the belt sander.

Here is what the final part looks like.

DSC00943