Showing posts with label Battery Box. Show all posts

Sunday, October 14, 2018

Battery Box Harness Part 4


The final part of the battery box harness is the small block at the goes on the bottom. I made these the same way as the top block. I started with a piece of hardwood and cut the notch on the router table. I then cut the pieces to length and angled the sides on my mini belt sander.

20181014_095257


To attach the hinge to the rest of the harness I drilled a hole in the end of the harness and the end of the hinge piece and connected them with glue and a small dowel.

DSC01912


I also used a down to connect the hinge to the battery box.

20181014_093939


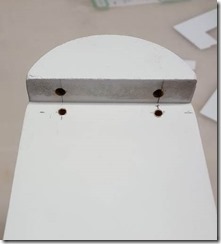
Initially I attached these incorrectly to the batter box. I thought the hinge attached to the front surface of the box so I had drilled the lower set of holes. After looking close are reference pictures I realized that it was supposed to go into the bottom of the half moon part, so I drilled another set of holes there. These holes would have been much easier to drill if I had done it before attaching the half moons. I had to drill these holes a little bigger then the dowel to be able to get the dowel into the hole. I will eventually fill the other holes, and they will be mostly hidden by the harness.
20180920_174536

Saturday, October 13, 2018

Battery Box Harness Part 3

In my last post I showed the first part of the hinge, next is the part that mounts to the battery box. This piece was made pretty much the same way as the first one.

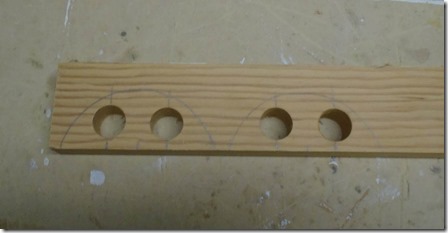
I started with a piece of hardwood long enough to make all the parts and also the correct thickness. I laid out the shape of the part and then drilled the hole for the hinge pin. I also cut the width of the finished part using a bandsaw.
DSC01904


Next I used a drum sander to create the round over.

DSC01905


Next I cut the finished thickness on the band saw.

DSC01906


DSC01907


Finally I cut the piece from the piece of wood I started with.

DSC01908

Saturday, October 6, 2018

Battery Box Harness Part 2

The next part of the battery box harness to make is the hinge at the top. I started by cutting some templates for the shape of the hinge pieces.

DSC01895


I started with a piece of hardwood cut to the rough dimensions of the final part and long enough to make all four copies of the part. I then traced the template on the wood being sure to also mark the center of the hole.

DSC01889


Before making any of the cuts I drilled the hole through the part.

DSC01891


Next I cut the rough shape using a jigsaw.

DSC01898


I then used my mini belt sander and files to clean up the cuts.

DSC01899


Next I used a second template to layout the fork shape on the end of the part.

DSC01900


I used a bandsaw to cut the fork.

DSC01901


The bandsaw doesn’t leave the bottom of the cut very clean, so I cleaned it up with a file.

DSC01902


Here is the finished piece.

DSC01903

Saturday, September 29, 2018

Battery Box Harness Part 1


There are two battery box harnesses on each battery box as shown below. Like a lot of the other parts I made these out of wood.

20180929_081145

They were build around a central shaft that was simply a rectangular piece of hardwood. I started by cutting four of these to the correct dimensions. Next is the larger part at the top. To make this I started with a piece of MDF cut to he correct height and width, and long enough to make all four pieces. I used the router table to cut a groove down the center which will fit over the center shaft.

DSC01883


Next I cut the four pieces to length and marked up where the angles need to be.

DSC01881

Instead of trying to cut the angles I made them on my mini belt sander.

DSC01887


Here is a look at the final piece

DSC01886


Attached to the front of this piece is a little faceted rectangle. I started this with some rectangular pieces of hardwood.

DSC01910


I used the belt sander to create the angled on the edges.

DSC01911a


Since this part overlaps the angled section I needed a small wedge to fill that area in.

DSC01911b


Here is what these parts look like when assembled.

DSC01909

Sunday, September 16, 2018

Battery Box Part 4

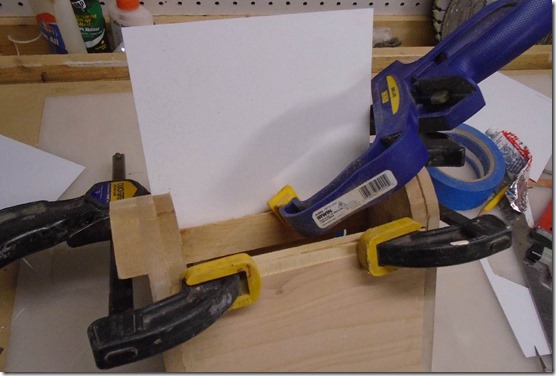
With the wood work done on the battery box then next step was the styrene. I started by cutting a piece that was the exact width for the end but a little longer then necessary.

DSC02712

Next I glued one end of the piece to the wood frame with epoxy and held it in place with clamps and tape.

DSC02713

DSC02922


Once the glue was dry I wrapped the piece around the rest of the way to determine the final length and made the cut. With the piece the correct length I glues it the rest of the way around with epoxy and again held it in place with clamps and tape. You can see here why I added a stiffener block behind the edge of the luan side made, it gave the clamps something to hold against.

DSC02711


The final step was to put some filler in the seams and sand everything smooth.

DSC02790

DSC02791

Saturday, September 15, 2018

Battery Box Part 3

The next step was to cut the half moon pieces that go on one side of the box. I made these just like the end pieces, cutting them on the router table with a pattern bit, and the cutting the finished pieces to the right lenght.

DSC01567

These were then glued to the box.

DSC01596

Once the glue was dry, the next step was to drill holes in the bottom one to hold the power cable, this is where I ran into a problem…

DSC02926

The MDF just didn’t hold up top to the drilling operation which destroyed the first one I tried to drill.

My second attempt worked out much better. I traced the profile of the curve onto a harder piece of wood and then before cutting them out, drilled the holes. With the holes drilled I then cut the curve on the band saw and cleaned it up on the drum sander. Finally I cleaned off the broken piece and glued on the new ones.

DSC02927

Saturday, September 8, 2018

Battery Box Part Two


The next step for the battery boxes is to make the side panels. I started by cutting pieces of Luan plywood to the correct size. These will fit into the rabbets I cut in the end panels.

DSC01596


Next I use the router table to cut a shallow rabbet along two edges of the panels. This will allow the styrene to sit flush with the side panel.

DSC01600


Finally I cut slots that will be used to attach these to the feet. On the foot here will be a screw with a large head. The head will go through the large hole and then battery box will slide down so the shaft of the screw will go in the small slot locking it in. I cut these buy just drilling a couple holes and then cleaning it up with a file.

DSC01601


After gluing these to the end panels I cut some strips of wood and glued them to the back of the panel underneath where the rabbet is that will hold the styrene. I did this because the Luan was a little to flexible and tended to bend when I tried to attach the styrene.

Monday, September 3, 2018

Battery Box Part 1


The next parts to make are the battery boxes that go on the outside legs. Here is a picture of the finished product. It is made from MDF ends, luan plywood sides and styrene for the rounded parts.

DSC02790


The first step was to make the end caps. I started out cutting some 3/4” MDF to the proper width. Ignore the fact that they are different length, they will all get cut to the same length when the end’s are rounded.DSC01562


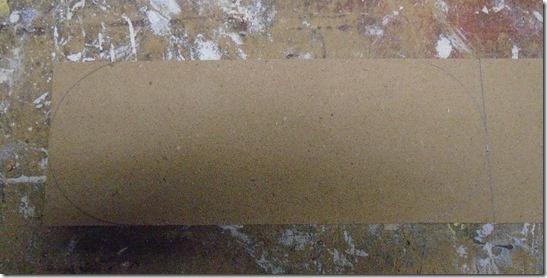
Next I cut a template out of hardboard that I will use with the router table and a template cutting bit to make the round ends. I only made the template one sided so that I could be sure all the ends were identical.

DSC01563


Next I marked the blanks for the locations of the curves and made rough cuts on the band saw.

DSC01564


Here is the template screwed to the blank. The side with the screw holes won’t be seen so there are no concerns with having to fill the holes later. With the template in place I made the cuts on the router table.

DSC01565


Here are all the ends panel cut.

DSC01566


The next step was to cut a rabbet on the edges of each piece to hold the side panels. These were cut on the router table using the fence as a guide since it’s a straight cut. The router will leave the ends of the rabbets slightly rounded so I cleaned them up with a chisel.

DSC01595


The final cut on the end pieces is a rabbet along the rounded ends to hold the styrene. It has been a while since I built these so I can’t remember how I made this cut. I assume I did it on the router table.

DSC01598