Saturday, September 15, 2018

Battery Box Part 3

The next step was to cut the half moon pieces that go on one side of the box. I made these just like the end pieces, cutting them on the router table with a pattern bit, and the cutting the finished pieces to the right lenght.

DSC01567

These were then glued to the box.

DSC01596

Once the glue was dry, the next step was to drill holes in the bottom one to hold the power cable, this is where I ran into a problem…

DSC02926

The MDF just didn’t hold up top to the drilling operation which destroyed the first one I tried to drill.

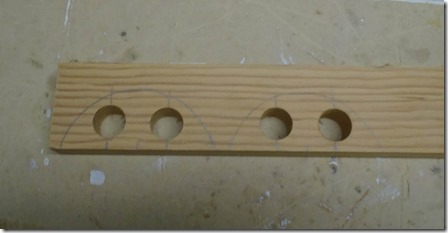
My second attempt worked out much better. I traced the profile of the curve onto a harder piece of wood and then before cutting them out, drilled the holes. With the holes drilled I then cut the curve on the band saw and cleaned it up on the drum sander. Finally I cleaned off the broken piece and glued on the new ones.

DSC02927

Saturday, September 8, 2018

Battery Box Part Two


The next step for the battery boxes is to make the side panels. I started by cutting pieces of Luan plywood to the correct size. These will fit into the rabbets I cut in the end panels.

DSC01596


Next I use the router table to cut a shallow rabbet along two edges of the panels. This will allow the styrene to sit flush with the side panel.

DSC01600


Finally I cut slots that will be used to attach these to the feet. On the foot here will be a screw with a large head. The head will go through the large hole and then battery box will slide down so the shaft of the screw will go in the small slot locking it in. I cut these buy just drilling a couple holes and then cleaning it up with a file.

DSC01601


After gluing these to the end panels I cut some strips of wood and glued them to the back of the panel underneath where the rabbet is that will hold the styrene. I did this because the Luan was a little to flexible and tended to bend when I tried to attach the styrene.

Monday, September 3, 2018

Battery Box Part 1


The next parts to make are the battery boxes that go on the outside legs. Here is a picture of the finished product. It is made from MDF ends, luan plywood sides and styrene for the rounded parts.

DSC02790


The first step was to make the end caps. I started out cutting some 3/4” MDF to the proper width. Ignore the fact that they are different length, they will all get cut to the same length when the end’s are rounded.DSC01562


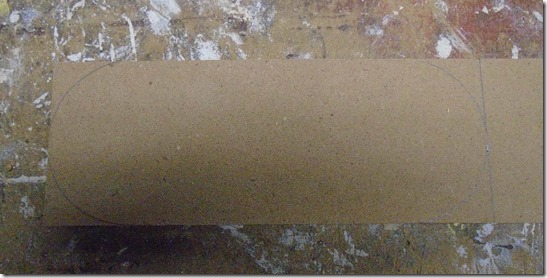
Next I cut a template out of hardboard that I will use with the router table and a template cutting bit to make the round ends. I only made the template one sided so that I could be sure all the ends were identical.

DSC01563


Next I marked the blanks for the locations of the curves and made rough cuts on the band saw.

DSC01564


Here is the template screwed to the blank. The side with the screw holes won’t be seen so there are no concerns with having to fill the holes later. With the template in place I made the cuts on the router table.

DSC01565


Here are all the ends panel cut.

DSC01566


The next step was to cut a rabbet on the edges of each piece to hold the side panels. These were cut on the router table using the fence as a guide since it’s a straight cut. The router will leave the ends of the rabbets slightly rounded so I cleaned them up with a chisel.

DSC01595


The final cut on the end pieces is a rabbet along the rounded ends to hold the styrene. It has been a while since I built these so I can’t remember how I made this cut. I assume I did it on the router table.

DSC01598

Saturday, August 25, 2018

Outer Feet Part 4

The next step on the outer feet was to do that styrene pieces on the top of the foot. I cut the pieces larger then needed, glued them on with White Gorilla Glue and taped them in place.

DSC02821

Once this was dry I used a Dremel to sand the styrene flush.

DSC02822

Friday, August 24, 2018

Outer Feet Part 3

The next step in building the feet was to do the styrene skins. He is a picture of the initial state of the foot. The screw at the top are going to be used to hold the battery boxes, I removed them before starting to attach the skin.

DSC02795


For the curved side I place a piece of styrene tight to that side, traced the shape and then cut it larger then needed. To glue the piece on I used two-park epoxy. I generally use epoxy when the joint needs to be strong and there is a small surface to glue to, both of which are a concern for this part. Initially I just glued the styrene to the large flat area at the top since it was easy to clamp this firmly. Once that part dried I lifted the skin, and applied epoxy to the remaining surfaces. The trickiest part of this was hold the skin until it dried.

As you can see in the following pictures I used a combination of clamps, tape and even a spray paint can to hold the skin tight to the frame.

DSC02818


DSC02819

Once the glue was dry and I removed the clamps I applied some more epoxy along the seams on the inside of the foot to further strengthen in.

Here is what it looks like after unclamping. I next used a Dremel to sand the styrene flush with the frame.

DSC02820


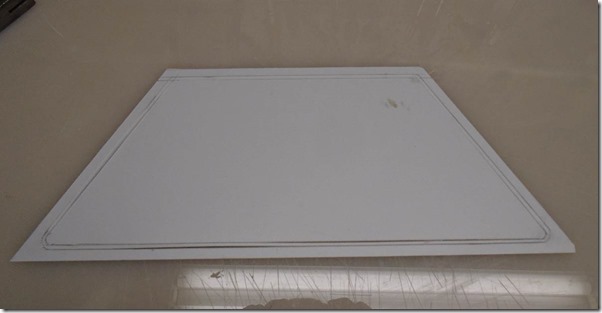
The skin on the flat side of the foot was much easier. Here you can see the piece with the layout marks. The area between the lines needs to be cut out to form a groove. I first tried doing this cut after gluing the piece in place, but it turned out to be much easier to make the cuts ahead of time.

DSC02828


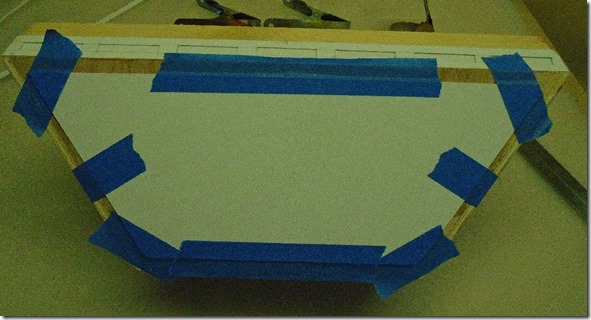
I started by gluing the inside piece first. Since this piece has a large surface area I used White Gorilla Glue for this. I used tape to prevent it from sliding until I could get some clamps on.

DSC02829


DSC02830

Once that was dry I attached the outside part using epoxy which I find holds better with the smaller surface area. I don’t have pictures of that.

Sunday, July 8, 2018

Outer Feet Part 2


The next part of the feet is the trim piece along the bottom. I started this with a piece of pine cut on the table saw to the right thickness and angles.

DSC01450


I glued these pieces together and used some small nails in a nail gun to tack them together.

DSC01451


Once the glue was dry I glued them to the bottom of the foot shells I showed in my last post. I put two thin screws into the center plywood web to hold the trim on until the glue dried.

20180617_134544


With the frame complete I started on the details along the bottom part. Below you can see the paper template I cut from the full sized plans.

DSC02715


I then used that template to markup the styrene for the part.

DSC02717


Finally I cut out the part. Two important notes about doing this. First I cut out the rectangular areas first before cutting it off the sheet because it makes it easier to hold the part as you cut. I also left the piece long on both ends and will cut it to size later so I am sure if fits the foot properly.

DSC02793


I could have attached this piece directly to the foot, but I found it was easier, and provided a cleaner result if I first glued this to a very thin piece of styrene and then glued the entire assembly to the foot. Here is the part being glued to the backing.

DSC02718


Here it is being glued to the foot shell.

DSC02797


Here is the foot shell with the trim pieces all attached. For the corners I used styrene glue to attach the pieces together and the sanded them smooth.

DSC02795

Friday, June 8, 2018

Foot Frame Part 1

I build the structure of the feet out of wood and eventually finished them with styrene details. In this post I will show the start of the process for building the outer feet. Here are the first three pieces cut out of plywood that form the channel where the foot connects to the leg.

DSC01442


Here you can see how the leg will connect to the foot.
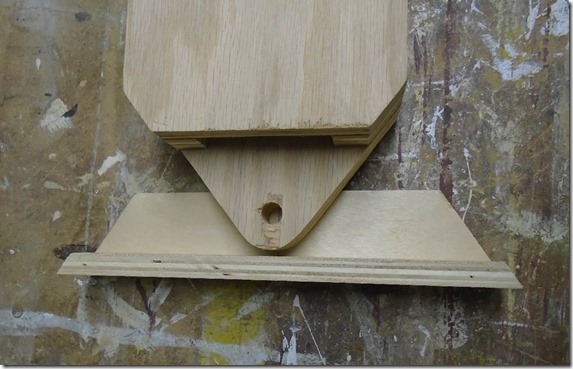
DSC01443


I first drilled a hole in the smaller piece that will receive a bolt to hold the foot to the leg. Next I clamped the small piece to the larger one and drilled the whole through the larger piece. Doing it this way assures that the holes are perfectly lined up.
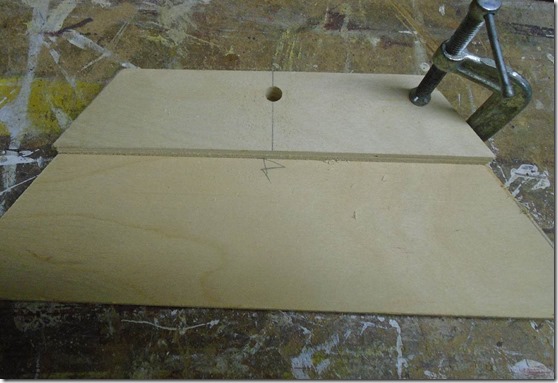
DSC01445


On the other side of the large piece I added a t-nut that the bolt will thread into.

DSC01446


With the holes drilled I glued up the three pieces and secured them with brad nails.

DSC01447


Next is another plywood piece that will be used to support the styrene on the curved side of the foot.

DSC01448


Here is that place glued in place. The two small holes at the bottom are to secure some old surplus drive units that just happened to have. More on that in another post.
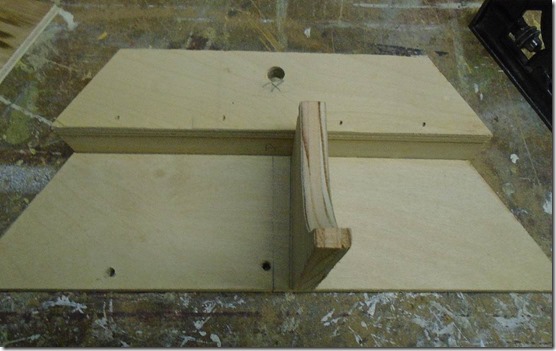
DSC01449


I also created a long hole near the bolt hole that will allow the wires from the motors to be routed into the legs.

DSC01452


Next I cut the ends of the foot out of luan plywood. I didn’t get a good picture of them before I attached them. Before cutting the final shape of these parts I ran the raw piece on the table saw to cut the proper angle on the top and bottom of the part.
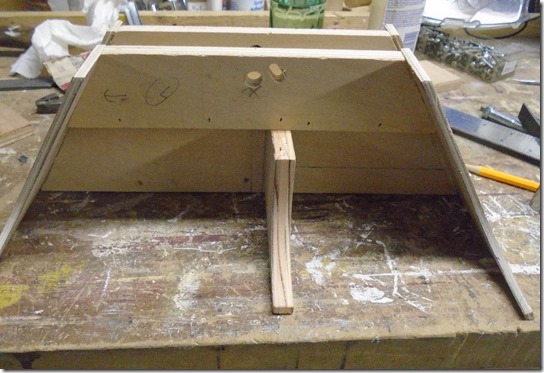
DSC01453


The next part is this block added to the back of the foot. The drive motor will go in the front section, and a caster wheel will go in the back. The block is set at just the right height for the wheel I plan to use.

DSC01456


The flat side of the foot is made with another piece of luan, so I first attached some small wood strips along the edge to better hold the side on. Here they are clamped on while the glue dries.

DSC01458


Here is the wood side glued and tacked on.

DSC01457